Exporting data using phpMyAdmin
This tutorial will show you the process of exporting data using phpMyAdmin
One question that comes up regularly is “How can I move my existing Joomla site to your servers?”. This can be achieved relatively simply in 3 steps.
- Upload your existing Joomla site files to your hosting account.
- Export (or dump) your existing MySQL database, then create a new database and import the data.
- Change your Joomla configuration settings.
This tutorial will focus on the process of exporting/importing the MySQL data.
Requirements:
- You will need to have phpMyAdmin available on both the development site and the live site.
- A web browser, preferably Firefox or I.E. as there are reported instances that phpMyAdmin and/or the gzip compression may have issues with Safari on Mac.
Making a MySQL dump from the 1st site.
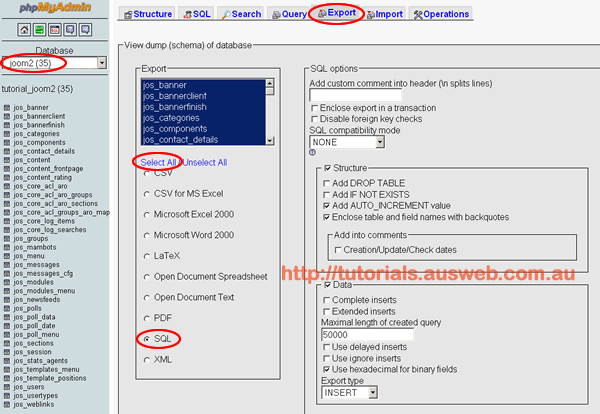
Log in to phpMyAdmin for the site you wish to export the existing MySQL data from, in this example “joom2”.
Choose the database you wish to export from the drop-down list on the left.
Select “Export” from the top menu.
Click “Select All” so that all tables in the database are exported.
Select “SQL” as the export type.
The rest of the settings can be left at default as shown below
Select “Save as file” and “gzipped” then hit “Go”

A pop-up window will open in your browser, select “Save to Disk” then click “OK”
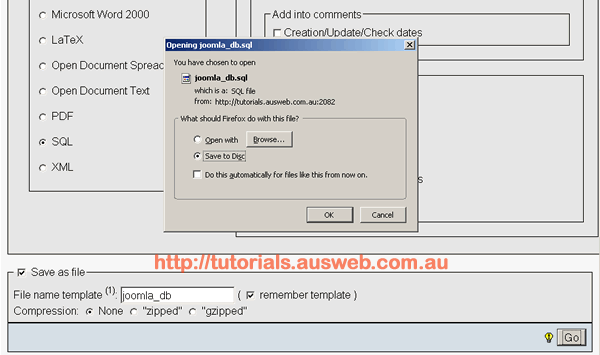
You now have a MySQL dump of your 1st site’s Joomla database.
Importing the MySQL dump from the 1st site to the 2nd site.
Before the data can be imported, the database must be created and user privileges assigned to it
Login to your Ausweb account cPanel by pointing your browser to http://yourdomain.com/cpanel where “yourdomain.com” is your real domain name. You will then be asked for a username and password (this information is supplied in your welcome email).
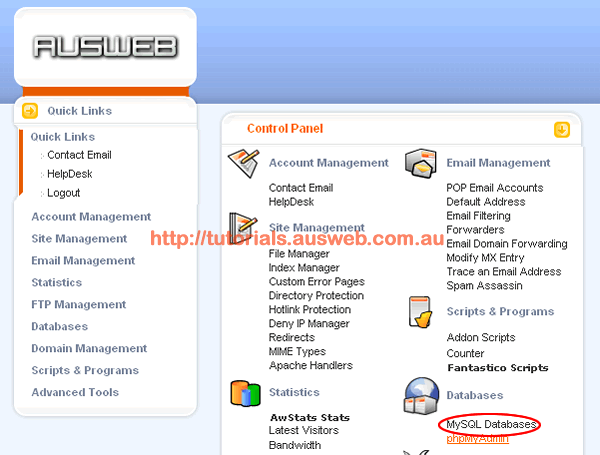
Now that you have logged into cPanel, click “MySQL Databases” from the list of options.
Create your new database by entering the name (in this example “joom3”) and click “Add Database”
![]()
Now we need to create a user that can be assigned to the database. Enter the username and password you wish to use then click “Add User”

Next add the new user to the database by selecting the user and the database from the drop-down lists, tick “All” privileges and click “Add User to Database”.

Now that we have created a new databse and added a user with privileges we can import the dump file from the 1st site.
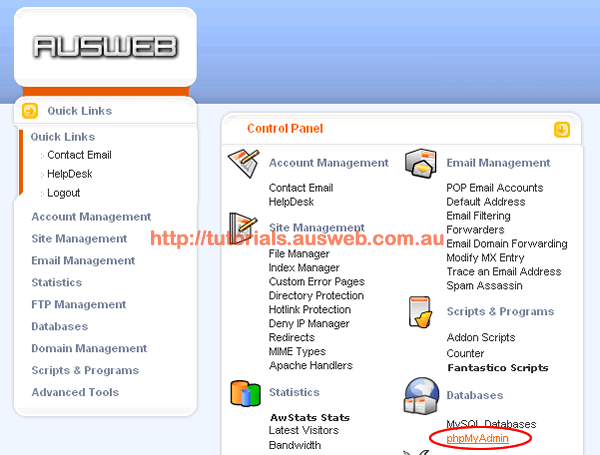
From your cPanel main page click “phpMyAdmin”
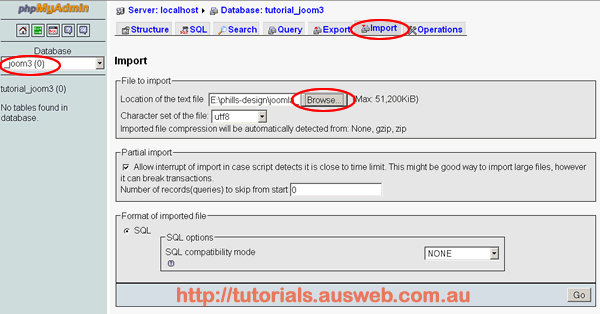
Once in phpMyAdmin select the new database we just created (joom3 in this example) from the drop-down list on the left. Select “Import” from the top menu and browse for the dump file downloaded from the 1st site. Click go to start the import process.
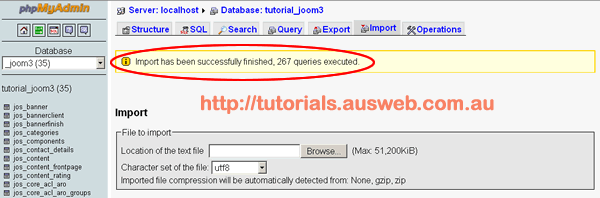
Once the import process has been completed you will be shown a message that the import was sucessful and the number of queries executed.
Congratulations! You just completed your first successful Move/Export of Joomla’s mySql DB to a new server via phpMyAdmin.
